

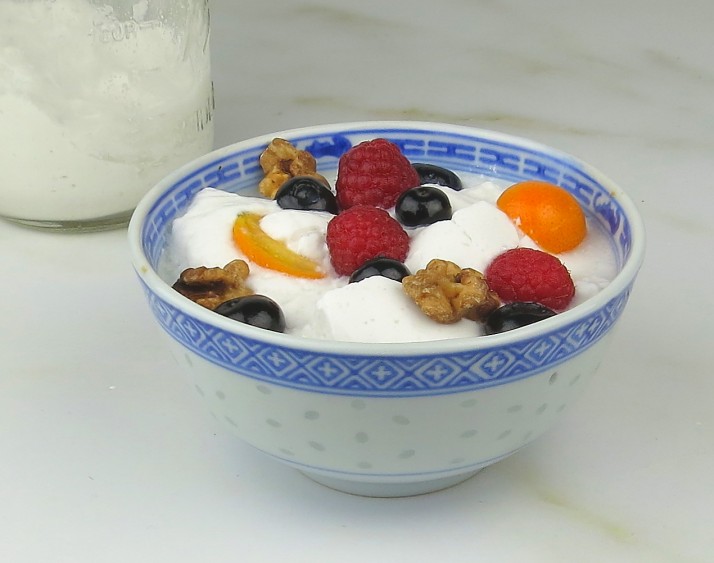
Here’s a foolproof recipe for thick, luscious coconut yogurt. This recipe has a rich flavor and dense texture, almost like Greek yogurt. It’s Paleo, it’s vegan, it tastes great with fruit, and is easy to digest. Coconut yogurt is naturally sweeter than milk yogurt, so it doesn’t need sweetener. You can add a bit of raw honey if you like.
Fermented foods help to build healthy intestinal flora, the foundation of a healthy immune system. Most homemade coconut yogurts are thin and liquidy – more like kefir. Store-bought coconut yogurt contains chemicals, stabilizers, and sweeteners. So I set out to discover an easy, healthy way to make it. After 18 trials with varied results, this recipe came out fabulous!
My favorite starter is a Bio-Kult probiotic capsule, available from Amazon. To thicken it I chose Agar agar, a tasteless a seaweed that’s also vegan. Agar powder is economical, instant, and best purchased online. You can buy 1-pound or 4-ounces from Healthy Village, Penn Herb, HerbCo, or Amazon. However you can also use agar flakes, available in most groceries – just be sure you cook the flakes for 2 full minutes and blend well. It takes 24 hours to make coconut yogurt, more than twice the time needed to make milk yogurt. Equipment: You’ll need a small blender or immersion blender. Yield: Makes 2 cups, or 1 pint. Or double the recipe and make a quart. This is easy – you can do it too.
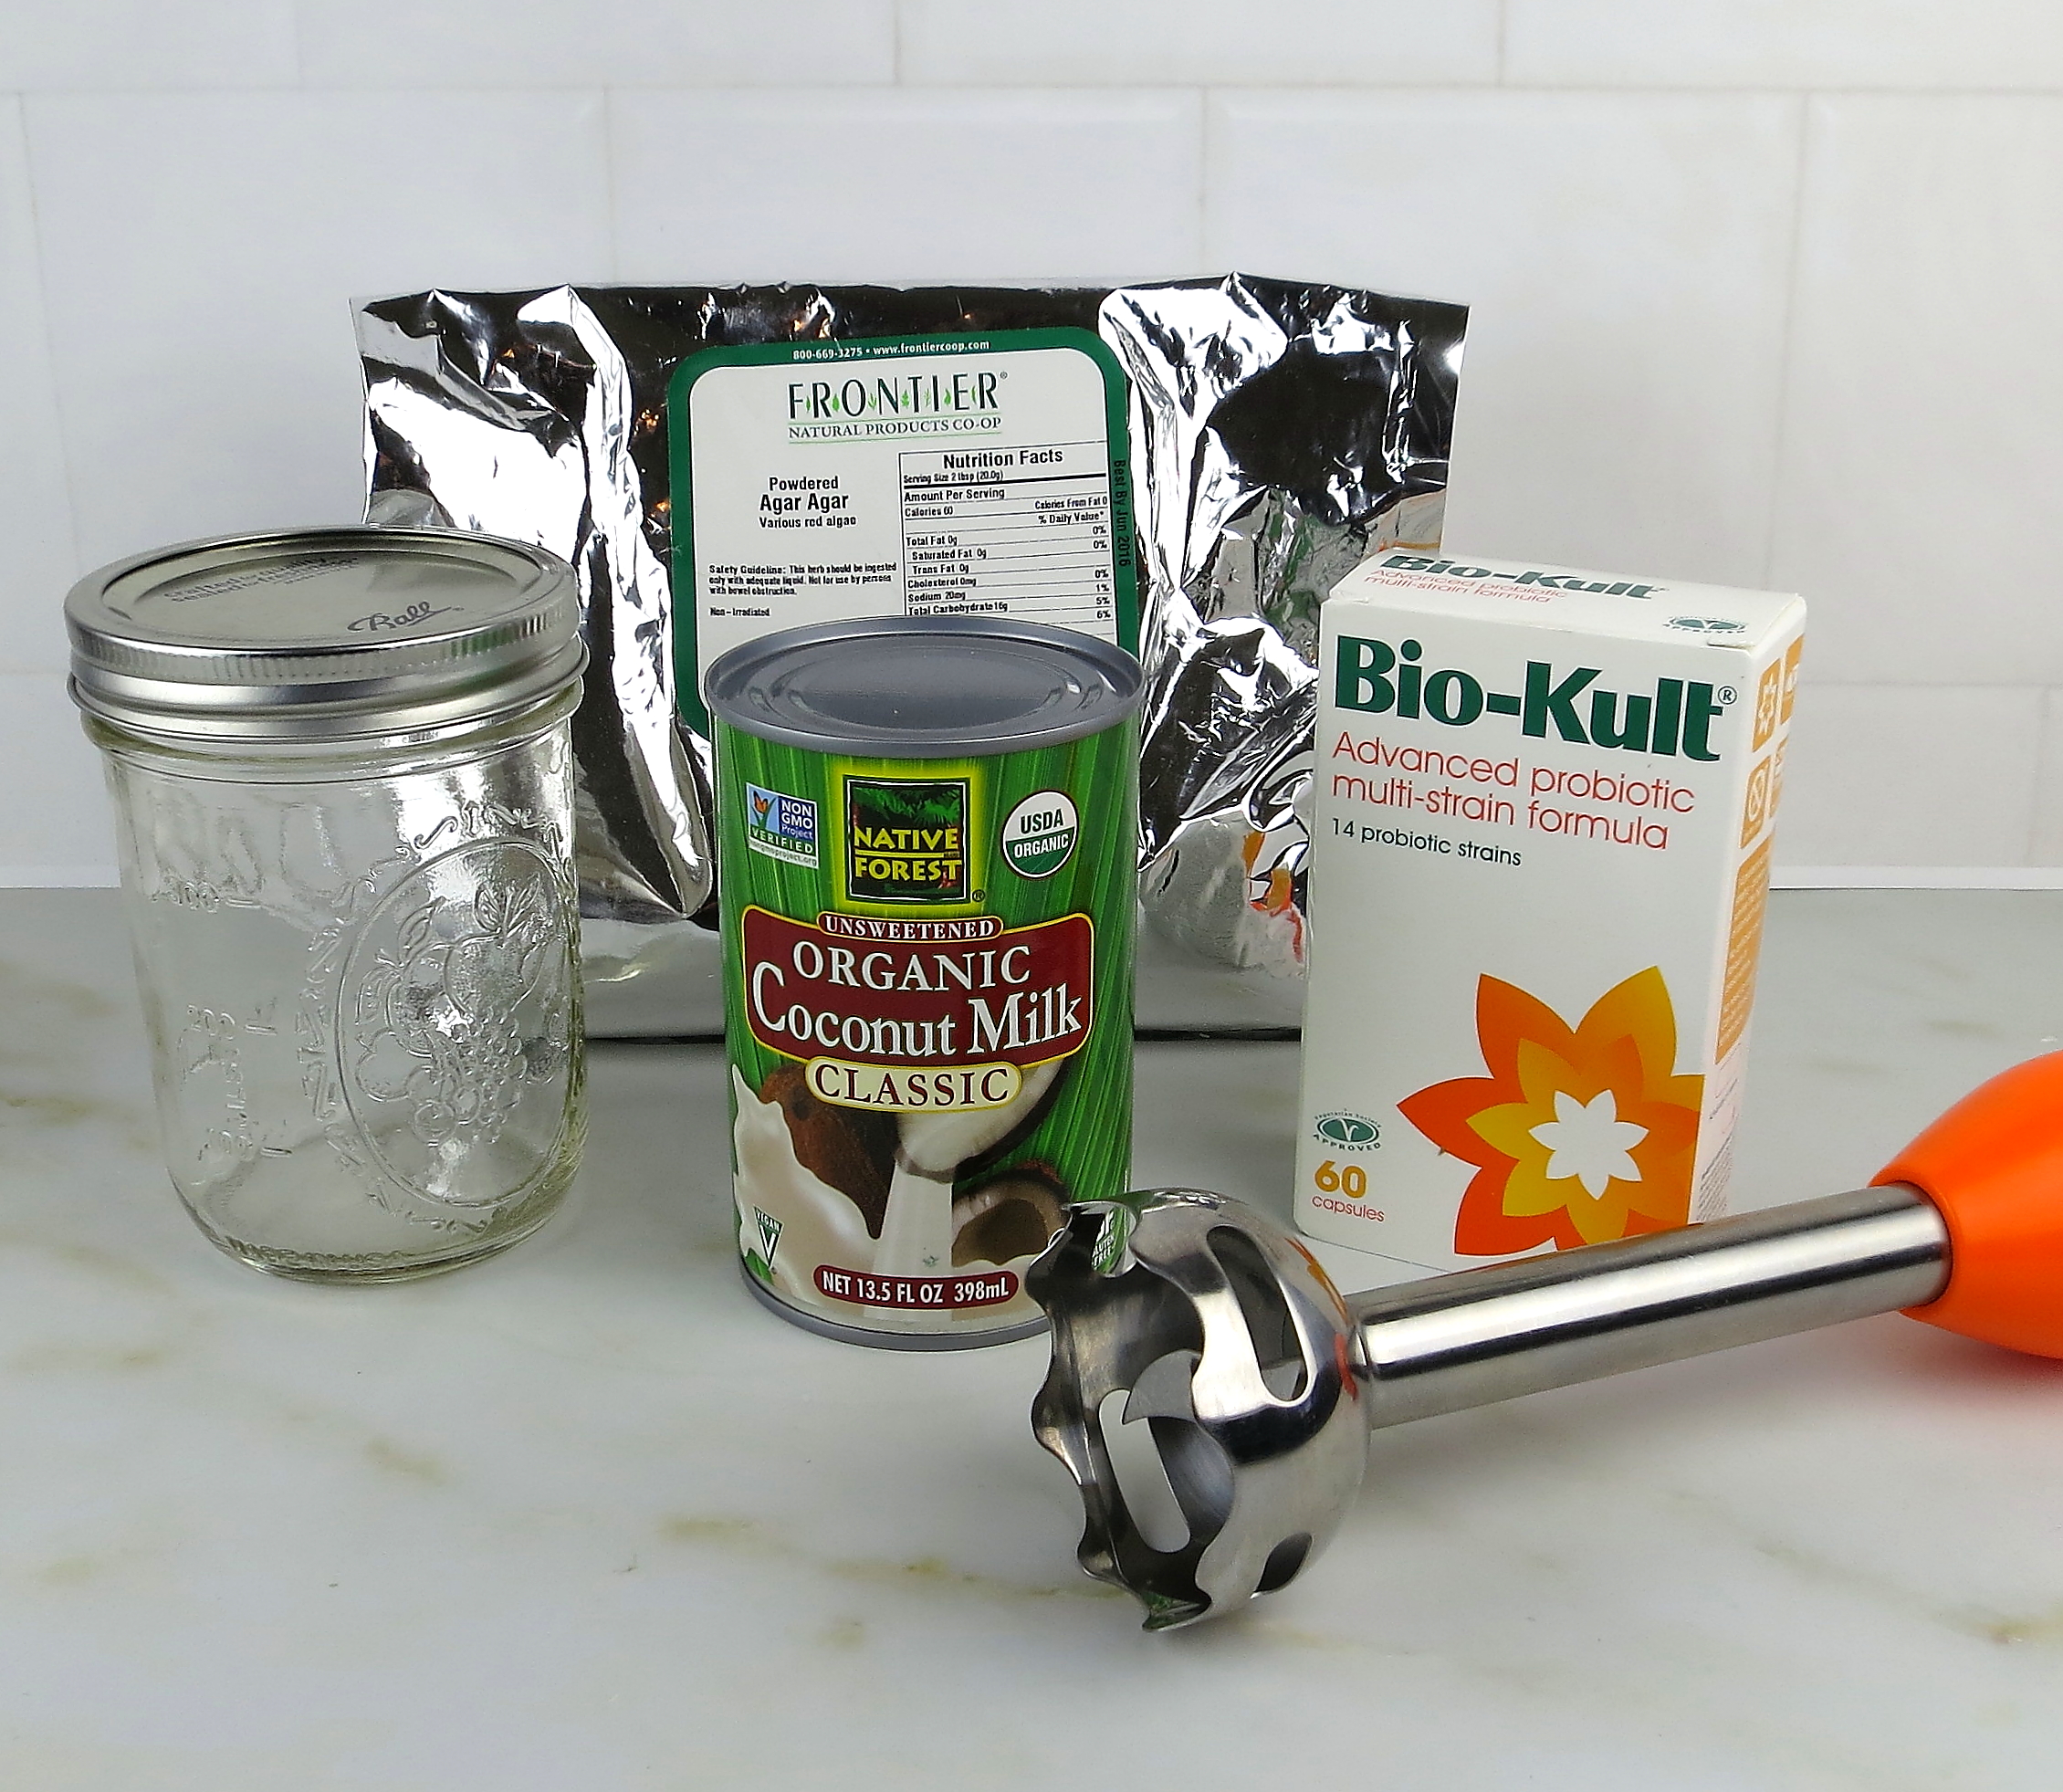
Easy ingredients: A can of full-fat coconut milk, a capsule of Bio-Kult probiotic as starter, and a bit of agar. You’ll need a glass jar (pint or quart), and a small blender or immersion blender.

I made 18 trials using various types of milks, thickeners, sweeteners, starters, times, and methods. And that’s a LOT of yogurt! Here are the top 3 recipes. The winner recipe is in the center.
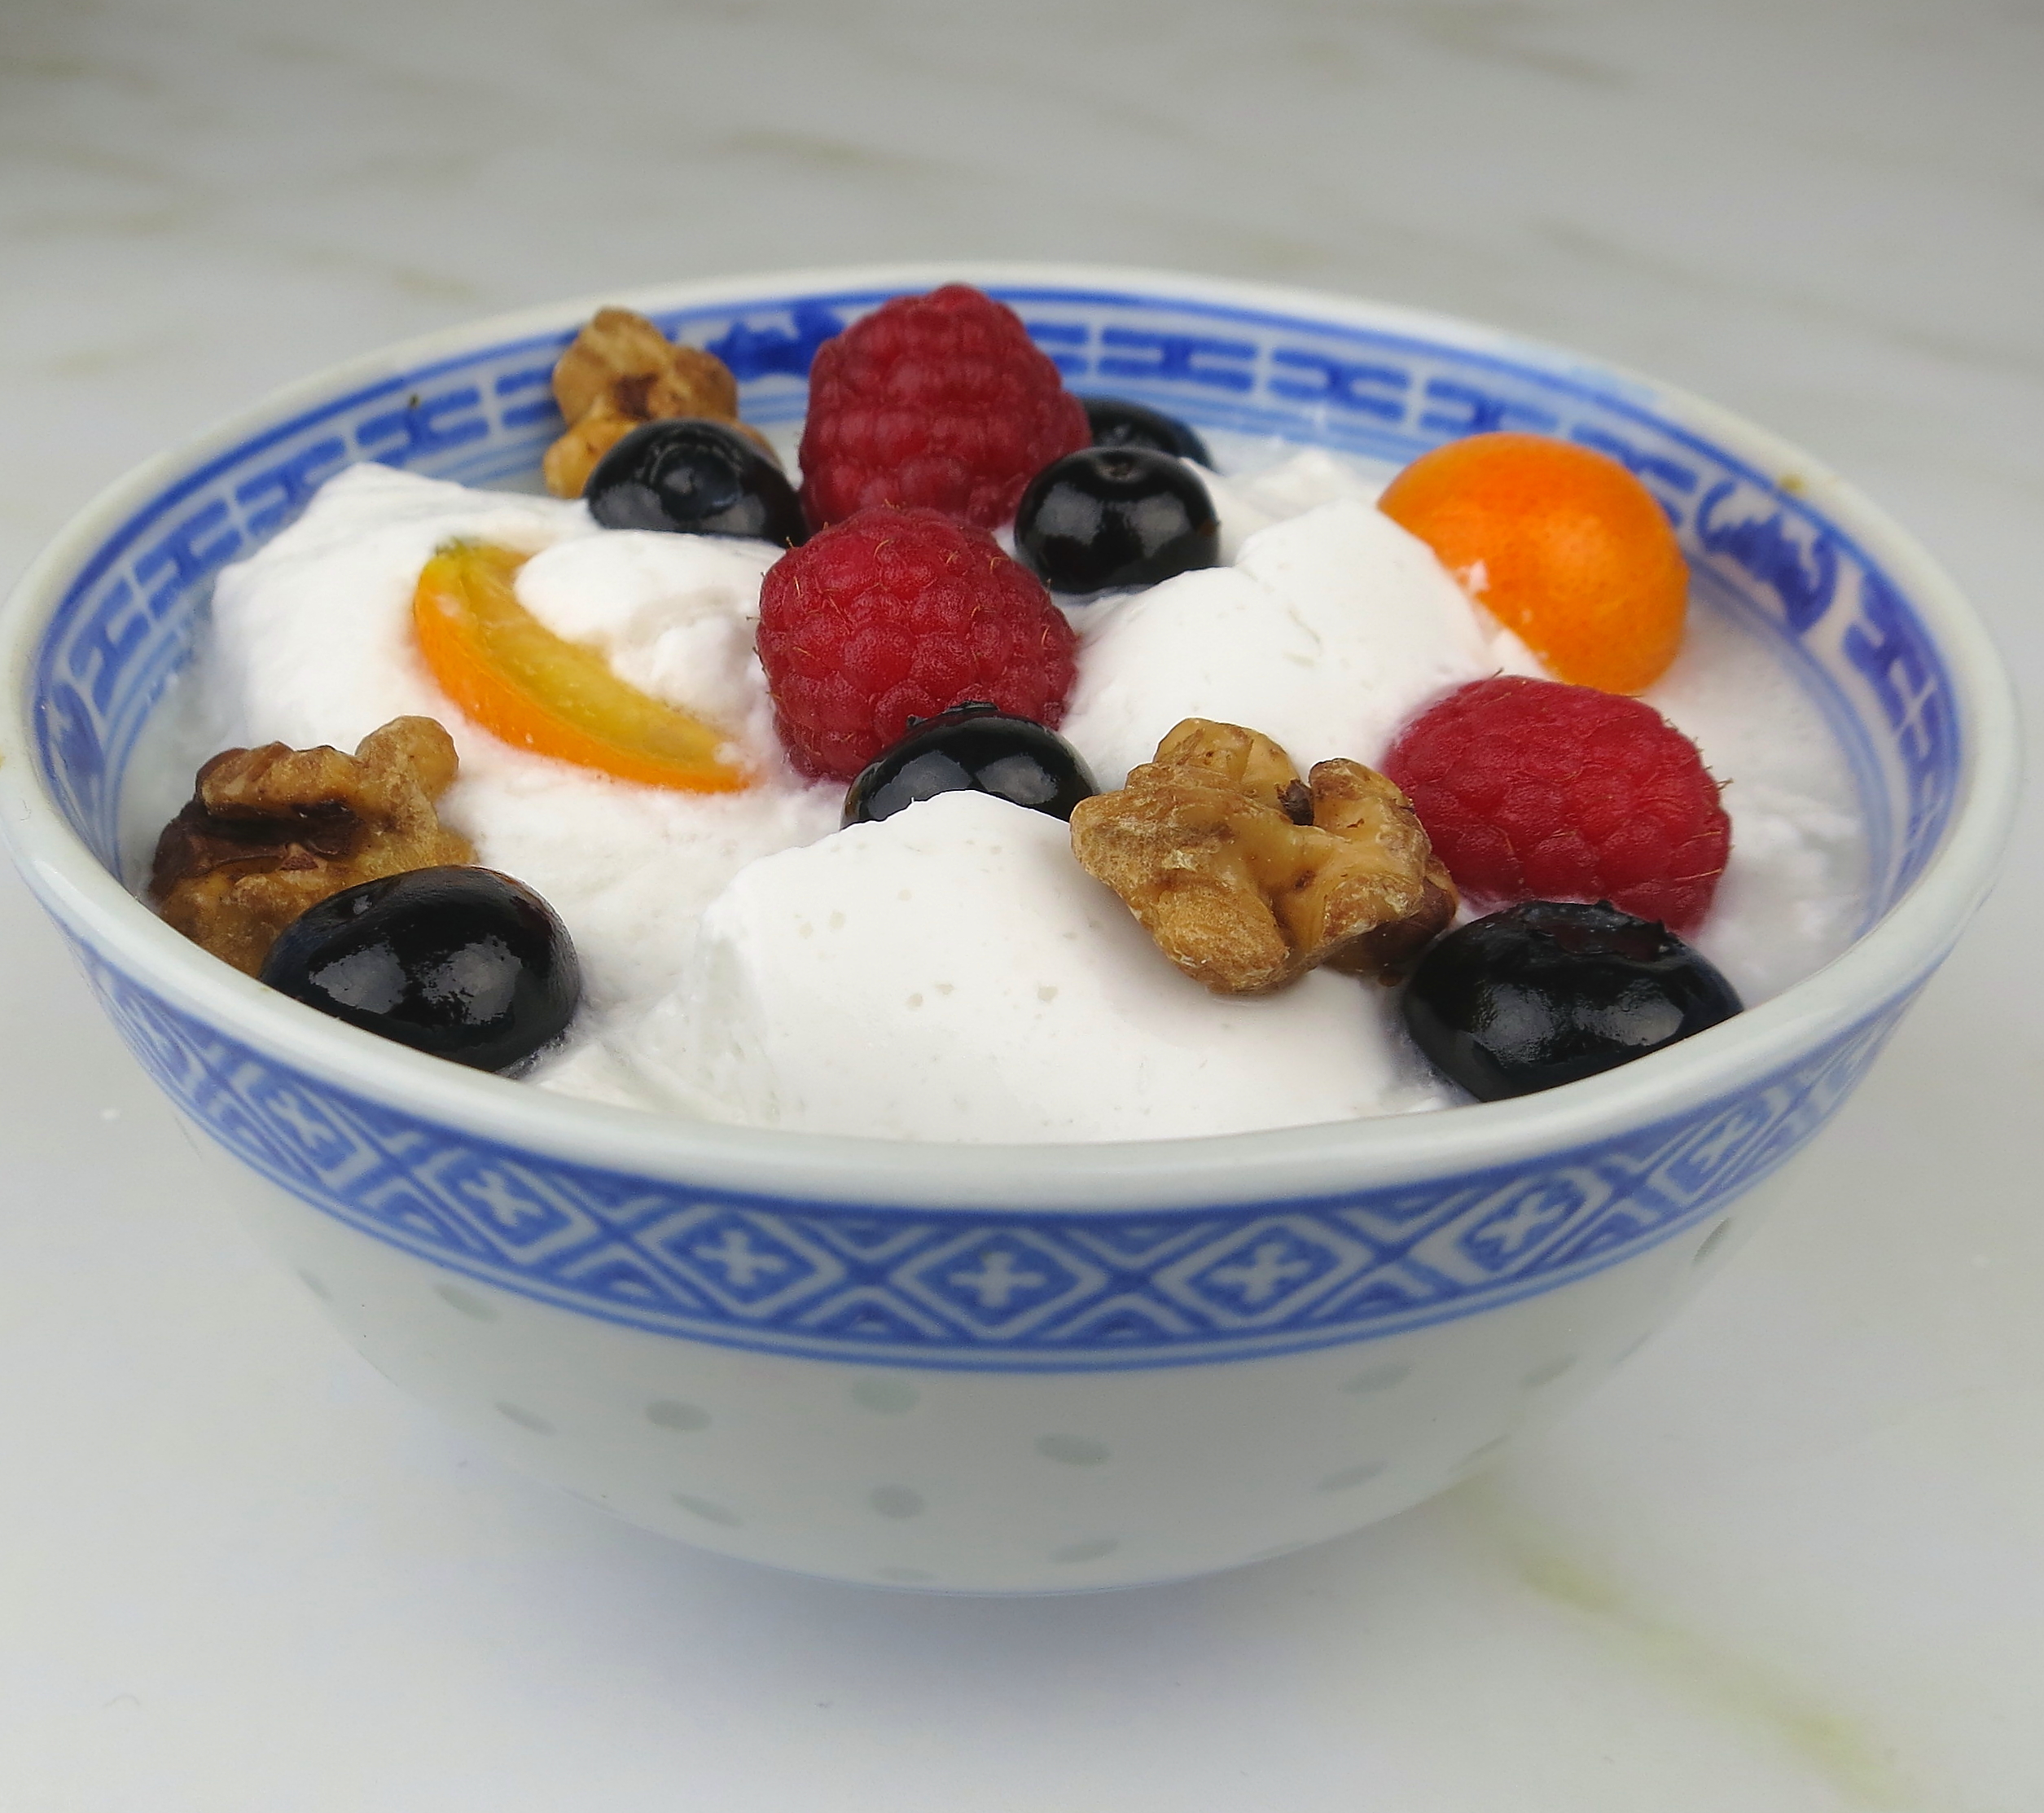
And the winner is….full-fat canned coconut milk blended with BioKult starter and agar powder. I added fruit, nuts, and ate the whole thing. Yum!
- 1 can thick, full fat coconut milk, Native Forest, at room temperature (Coconut beverage in a carton will not work. Homemade coconut milk tends to separate.)
- 1/2 teaspoon agar powder, or 1/2 tablespoon agar flakes. (Thickens the texture and prevents separating.)
- Best Starter: 1 capsule BioKult probiotic, opened and emptied. This made by far the thickest and creamiest yogurt of all the starters I tested. Order it online at Amazon. I got fair results with Inner-Eco fermented coconut water probiotic kefir, or 1 capsule any probiotic.
- 1 – 2 teaspoons raw honey is optional.
- 1 glass jar with a tight-fitting lid. (I used a pint, which is 2 cups)
- A small blender or immersion blender
Instructions
- Open the can of coconut milk, pour into a clean blender. Blend well.
- Pour 1/3 cup of the coconut milk from the blender into a shallow pan on the stove. Add 1/2 teaspoon agar powder (or 1/2 tablespoon agar flakes) into the milk, and stir it in.
- Turn the heat on low. Heat mixture very slowly to boiling, stirring a bit. Allow ixture to bubble gently for 60 seconds (2 minutes for agar flakes).
- Remove from heat. Immediately put the agar mixture into the blender with a clean rubber scraper. Blend well until completely smooth.
- Open a probiotic capsule into the blender (do it over the container so you don’t lose any). Blend again.
- Pour the mixture into a clean 2-cup glass jar, and put the lid on.
- Put the jar in a quiet, happy place for 24 hours at 105º F. (Oh, go ahead and talk to it!) The trick is to maintain a constant warm temperature, and here are several options: Easiest are a dehydrator or a yogurt maker set at 105º F for 24 hours. If you don’t have one of those, put the jar in an oven that’s not hot, and turn on the oven light, which is probably enough to maintain a warm temperature. If your light doesn’t stay on when the door is closed (like mine) set a heating pad on low heat, and leave it in the oven with the door closed as much as possible, connected to an outlet nearby .
- After 24 hours, remove the yogurt from its fermenting place. Chill at least 3 hours to thicken. Then try it!